Ferrari 360 USB Panel Installation
Step 1

Remove the ash tray compartment. Slide up to remove.
Step 2

Remove the Philips head screw at the bottom. Store safely as it will be reused.
Step 3

Pull the ash tray up and unplug the cigarette lighter connector. Tuck the wires under the centre console out of the way.
Step 4

Remove the hex screw under the ash tray.
Step 5
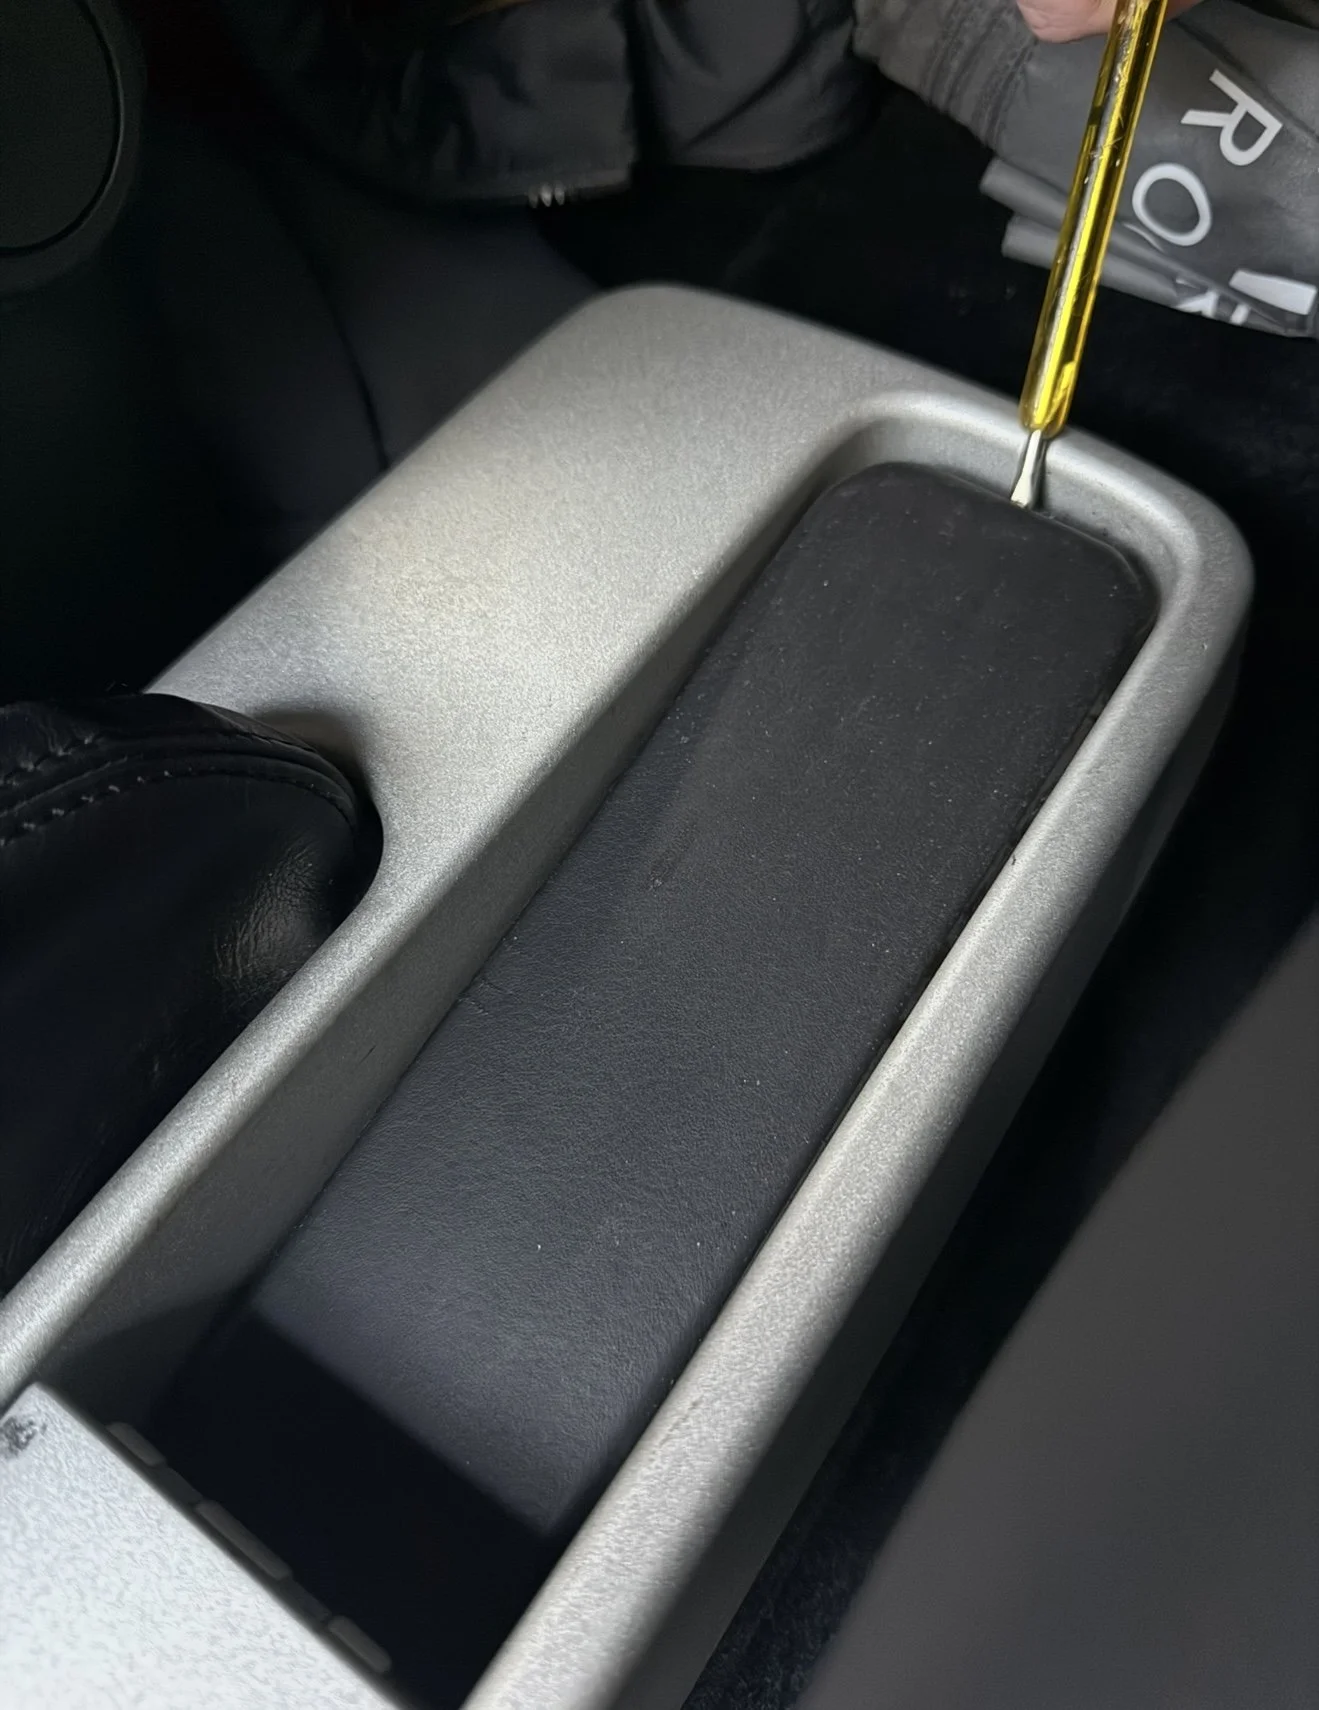
Use a flat tool such as a plastic trim remover or flat head screwdriver to lift the edge of the leather trim at the back of the centre console.
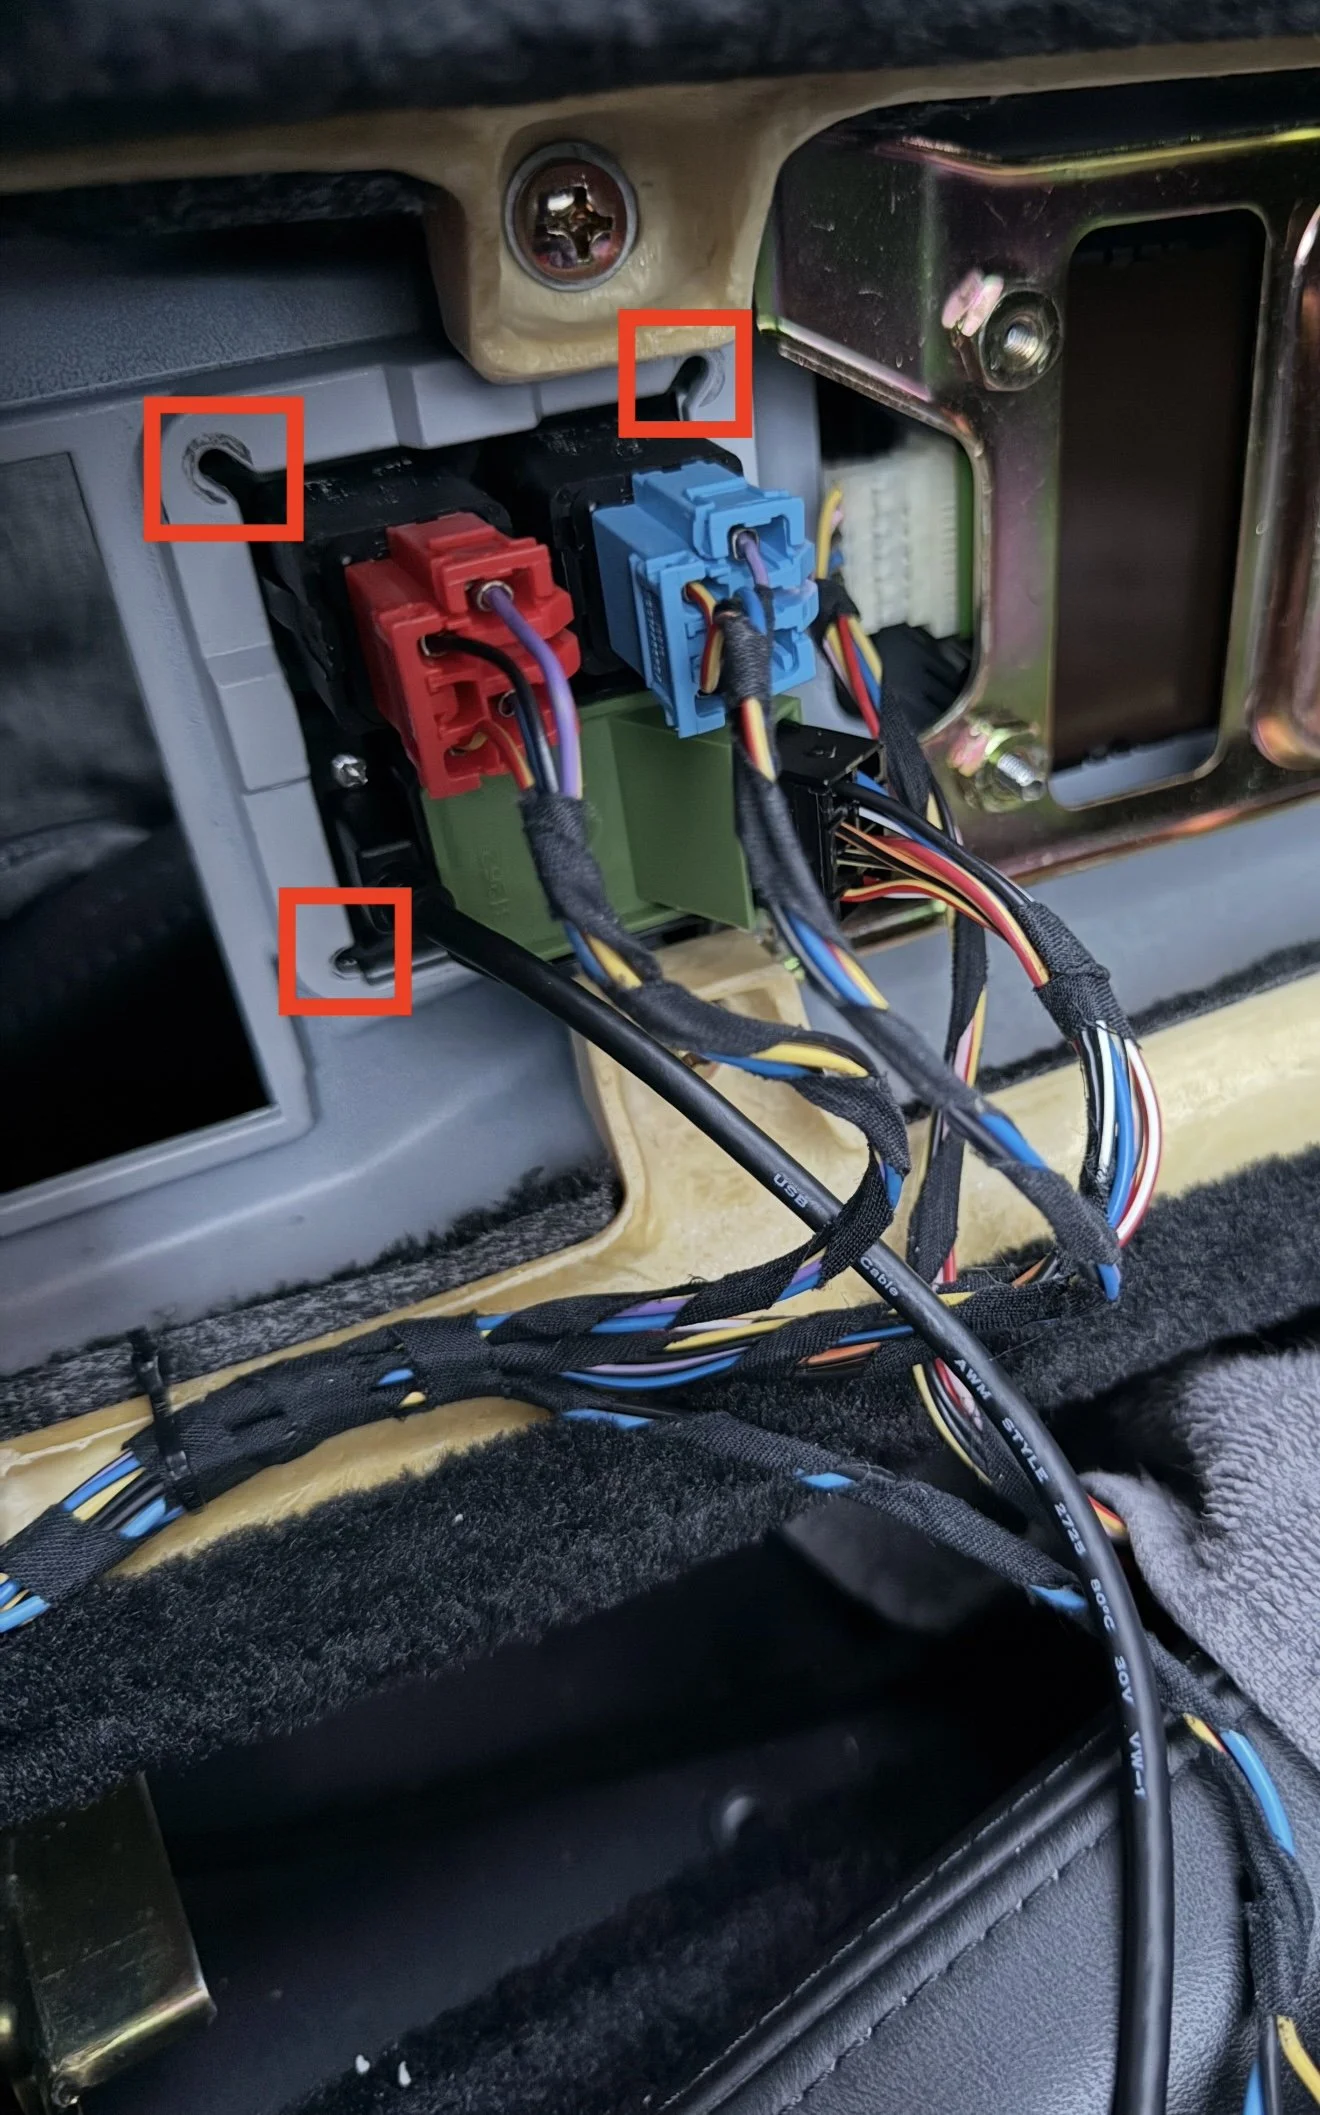
Step 6
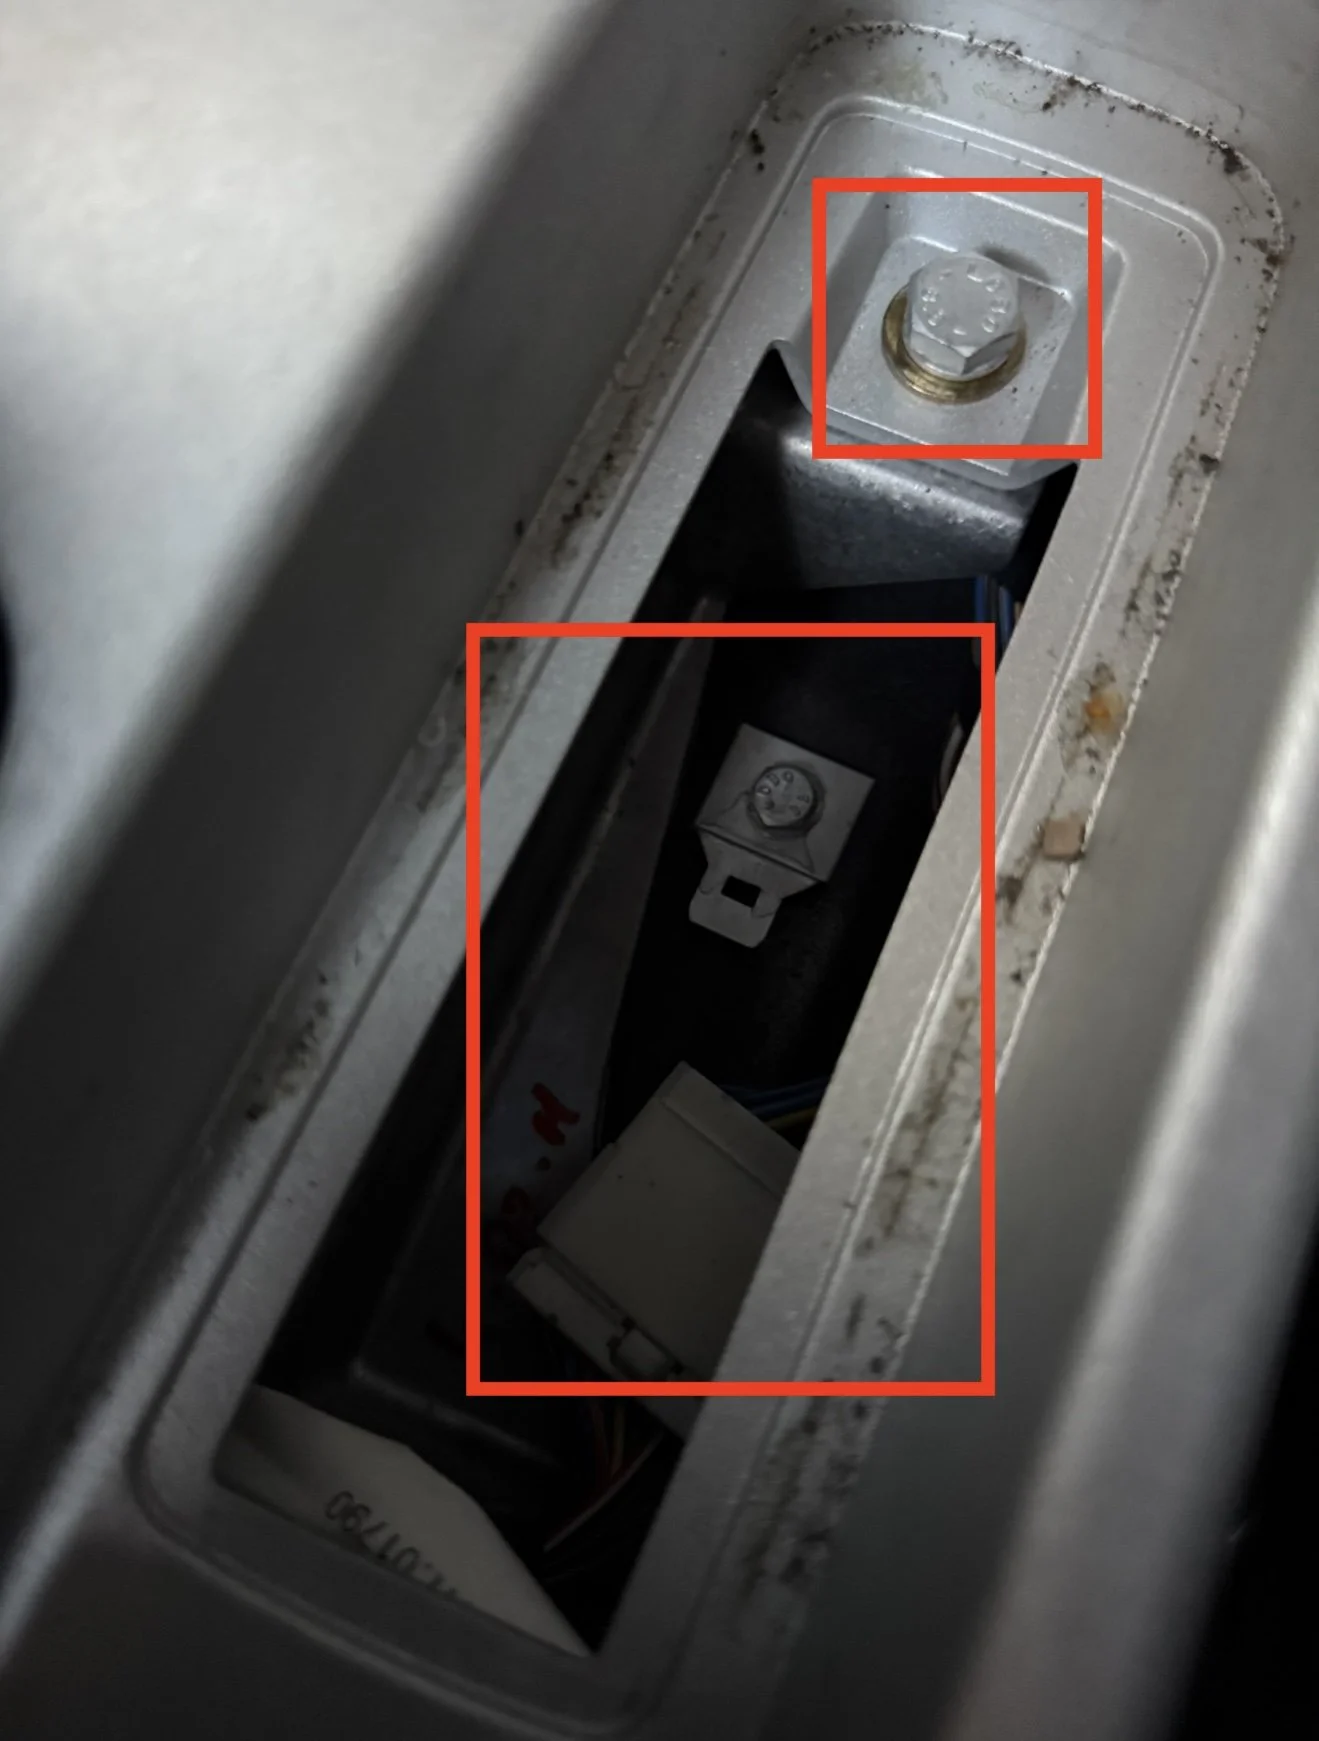
Remove the bolt at the back of the centre console highlighted above. Inside the cutout at the back of the centre console, there is a wiring harness clipped in, slide it towards the front of the car to release it.
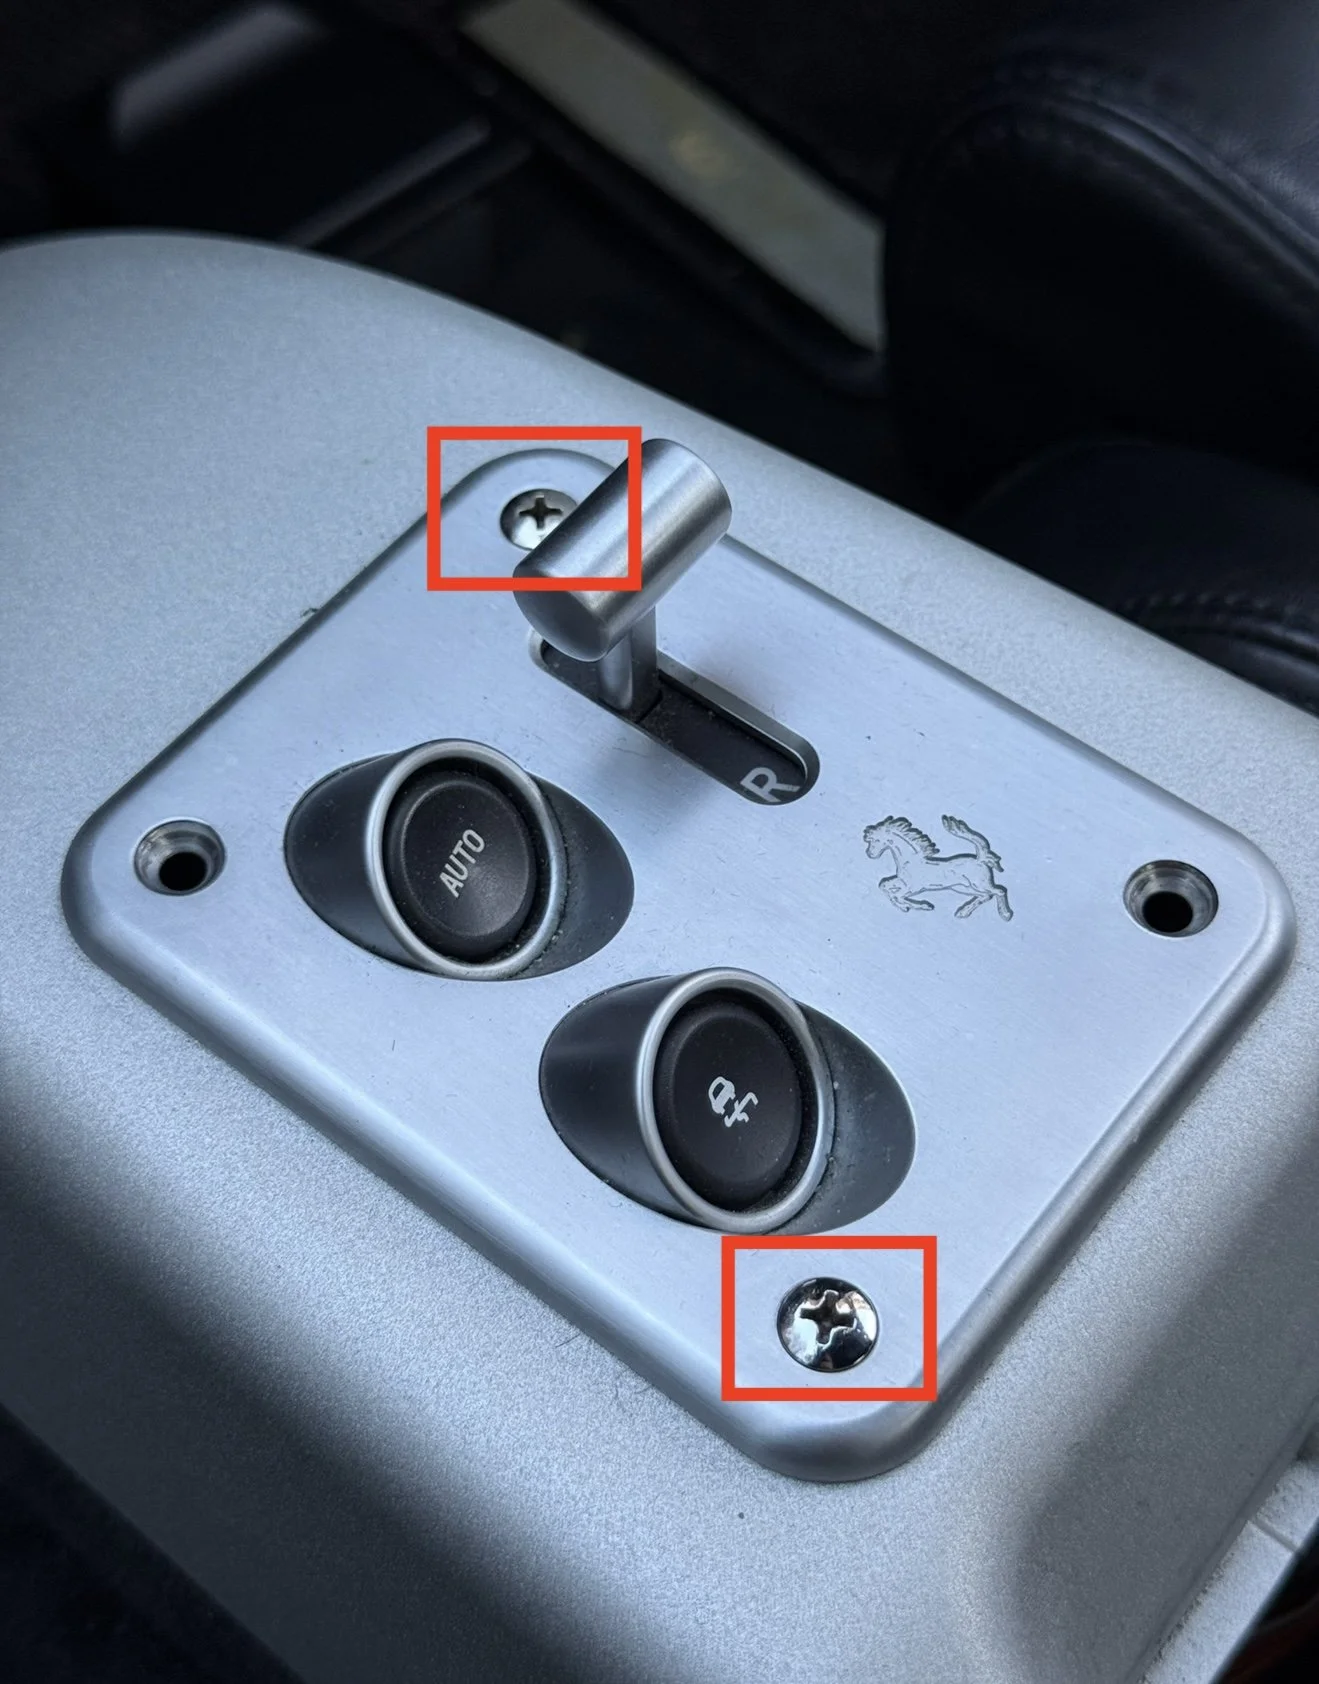
Step 7
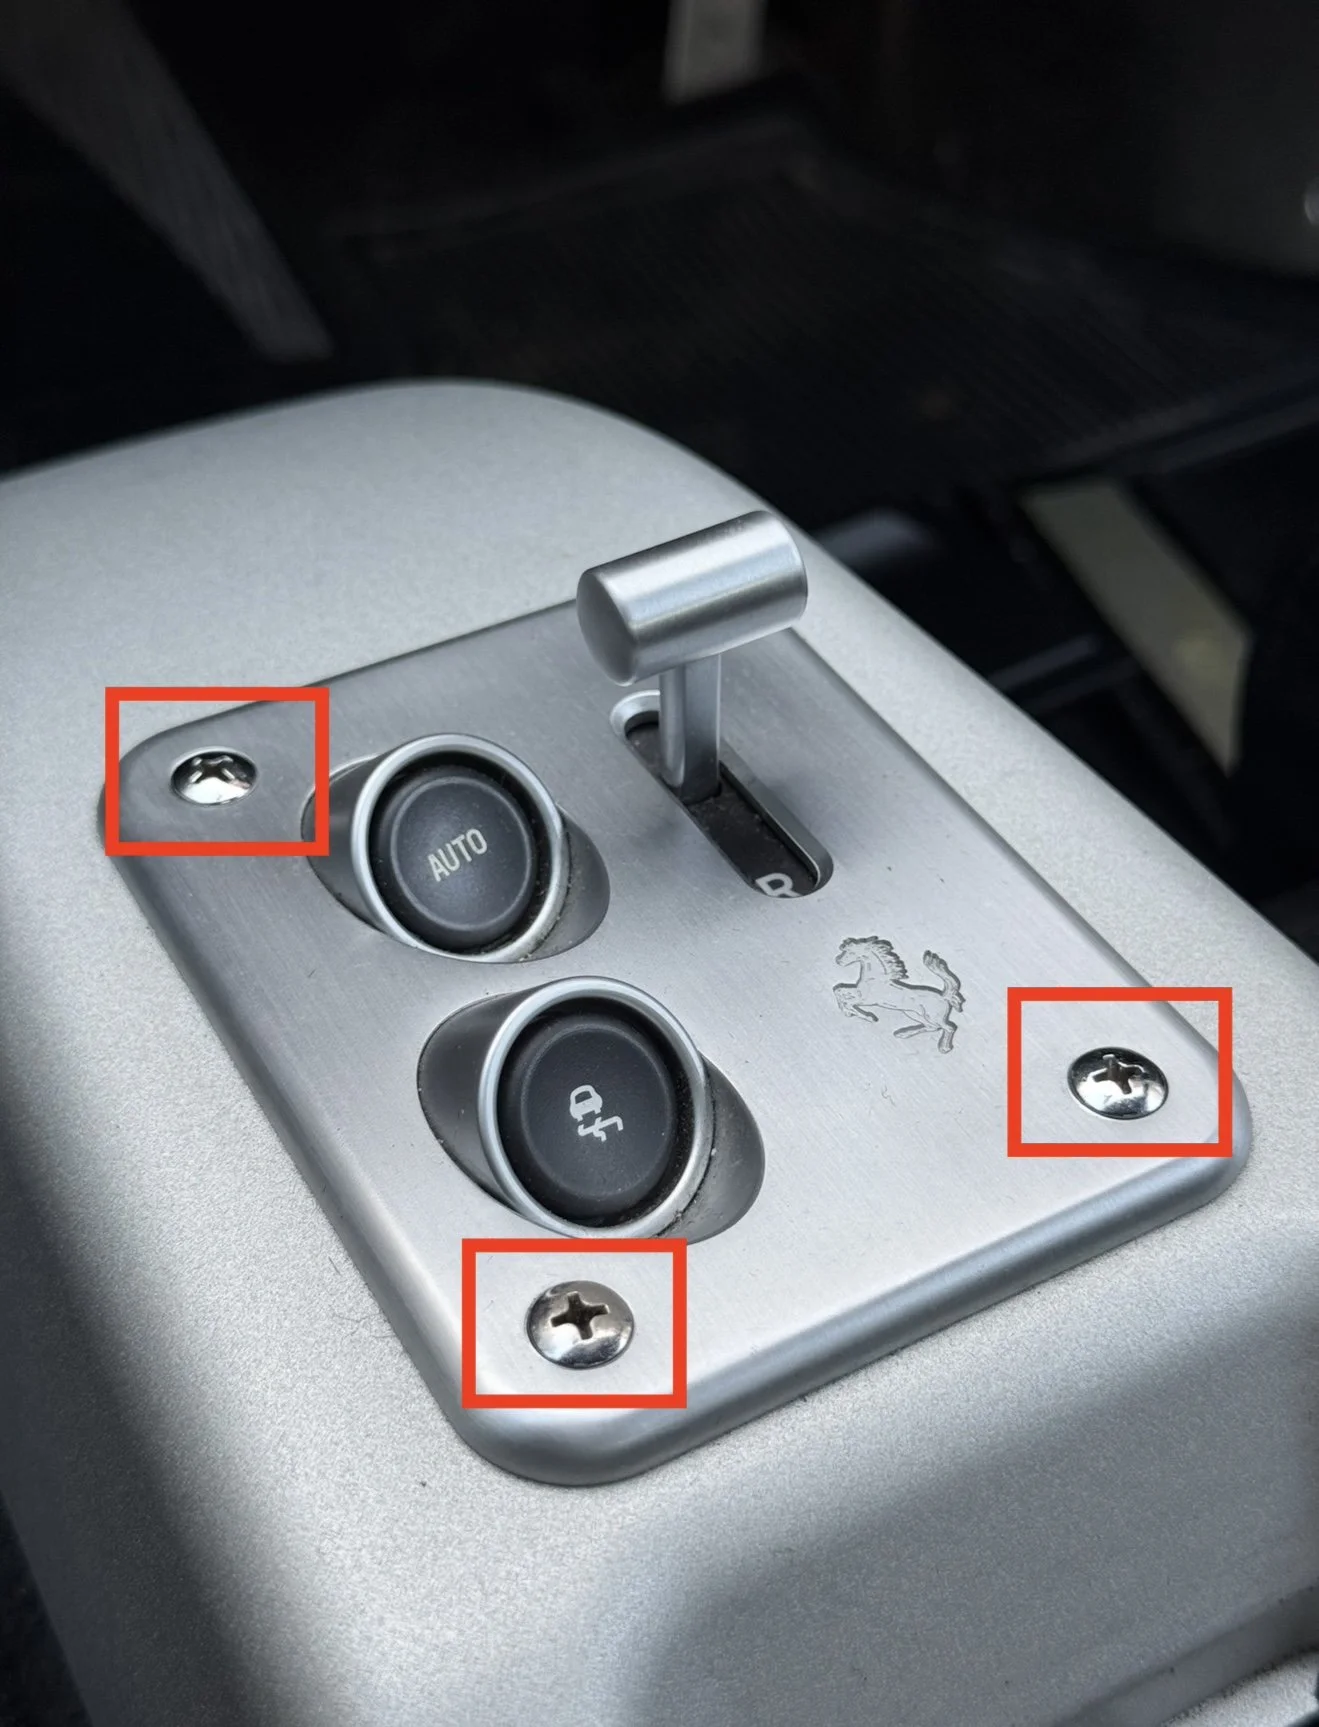
Undo the 4 screws holding in the F1 gear selector.
Step 8
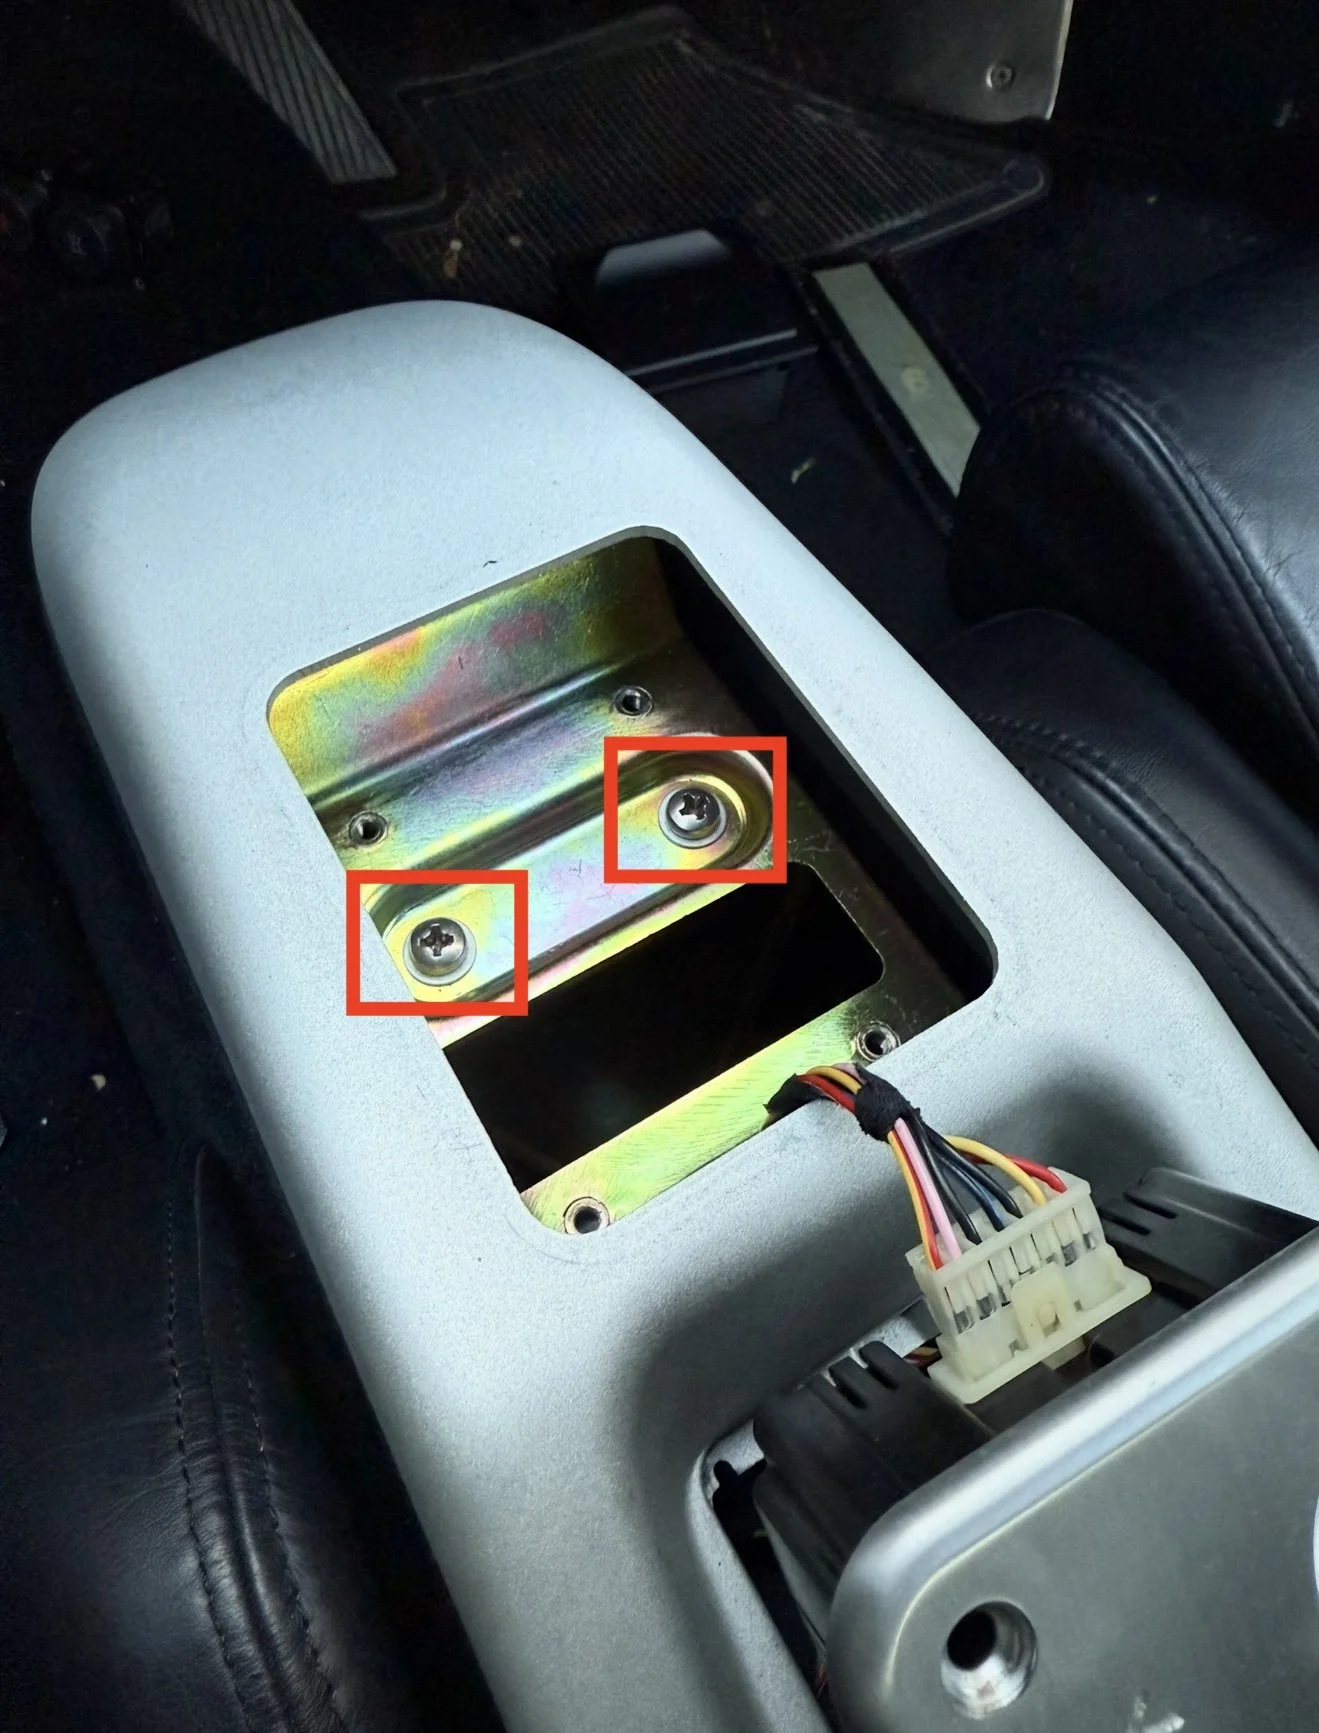
Remove the F1 gear selector (be careful of the attached cable plugged in). Remove the two screws under the gear selector highlighted above.
Step 9
In the following steps you have to turn the centre console over, you can either unplug the gear selector cable and remove it or put it back in temporarily with two screws to hold it in place.
Step 10
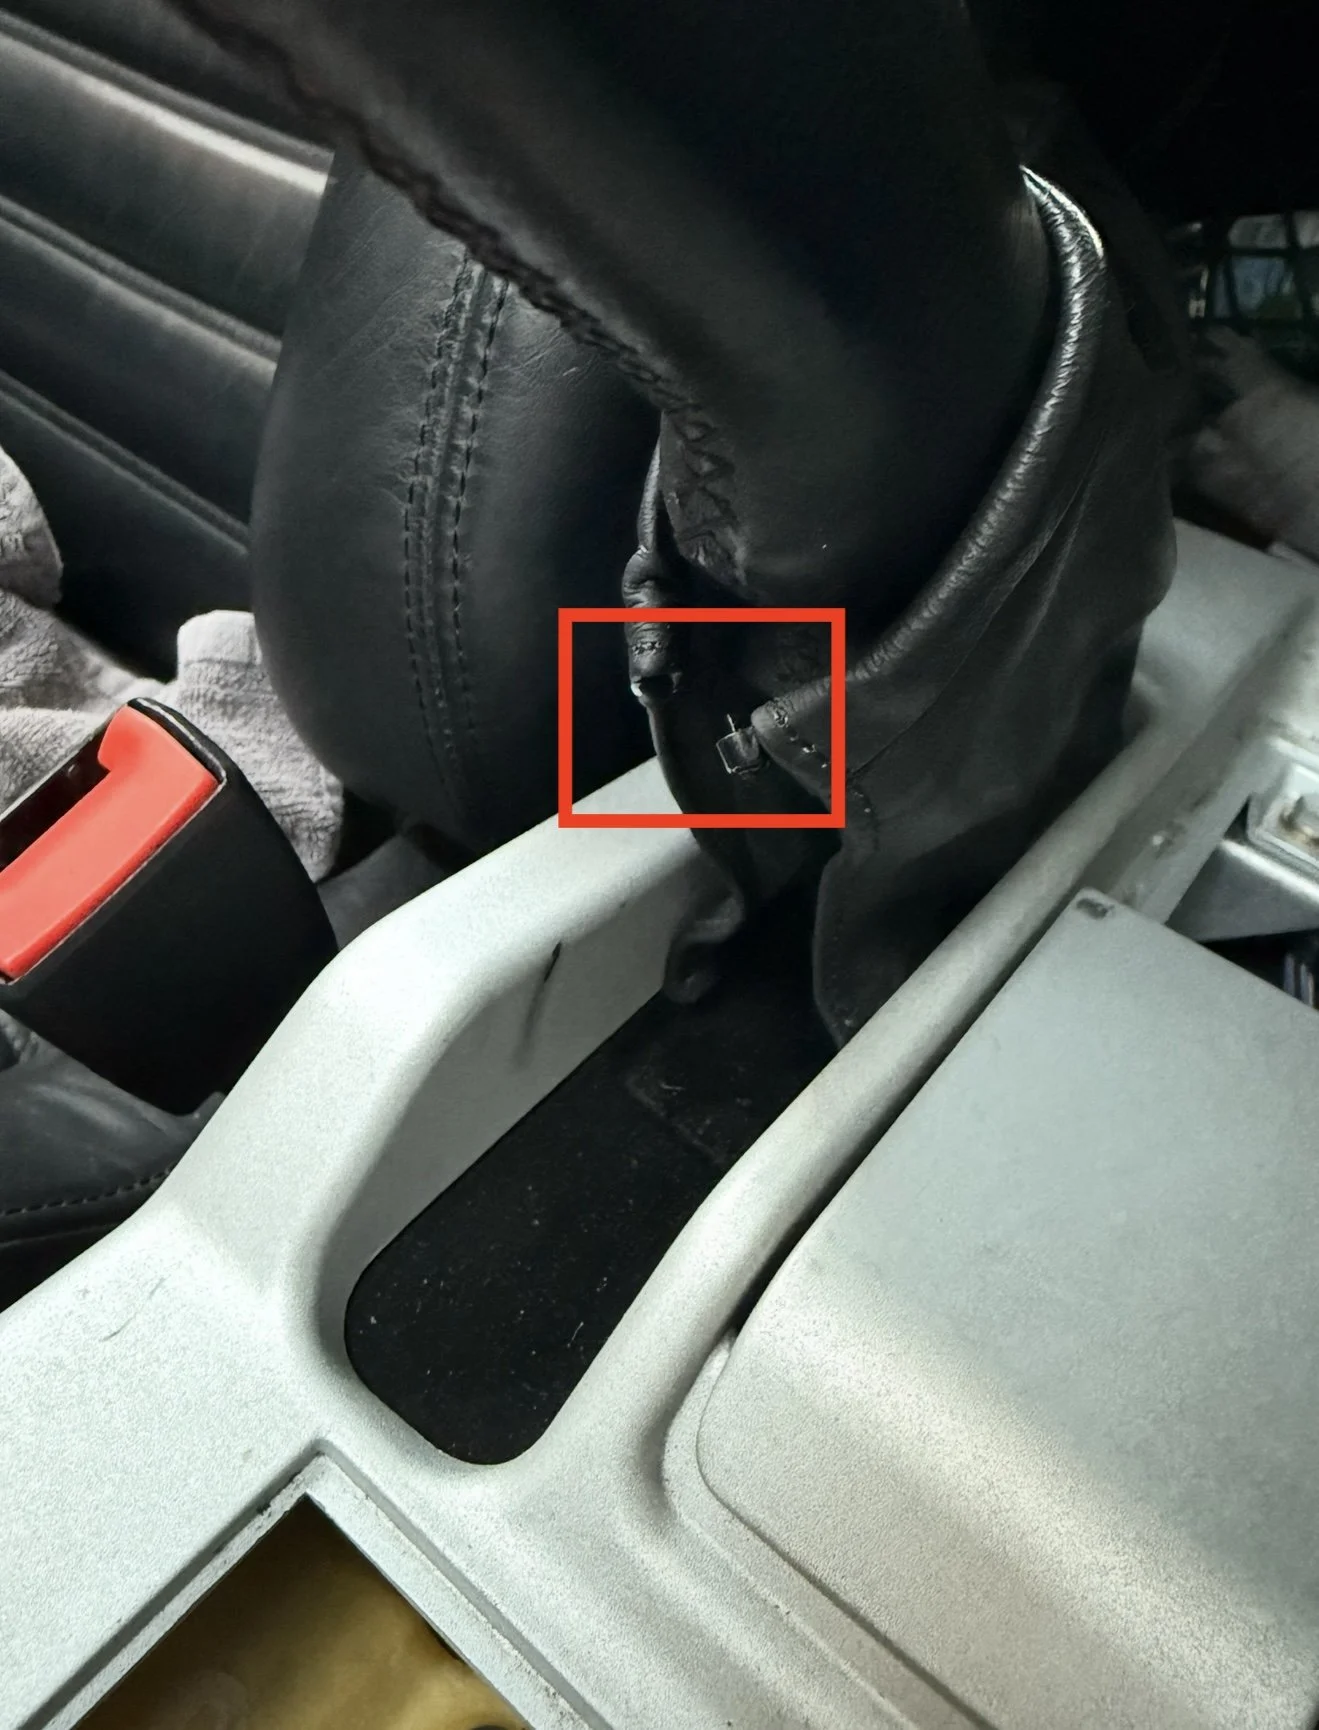
There is a cable tie holding the shift boot in place, this needs removed in order to remove the centre console.
Step 11
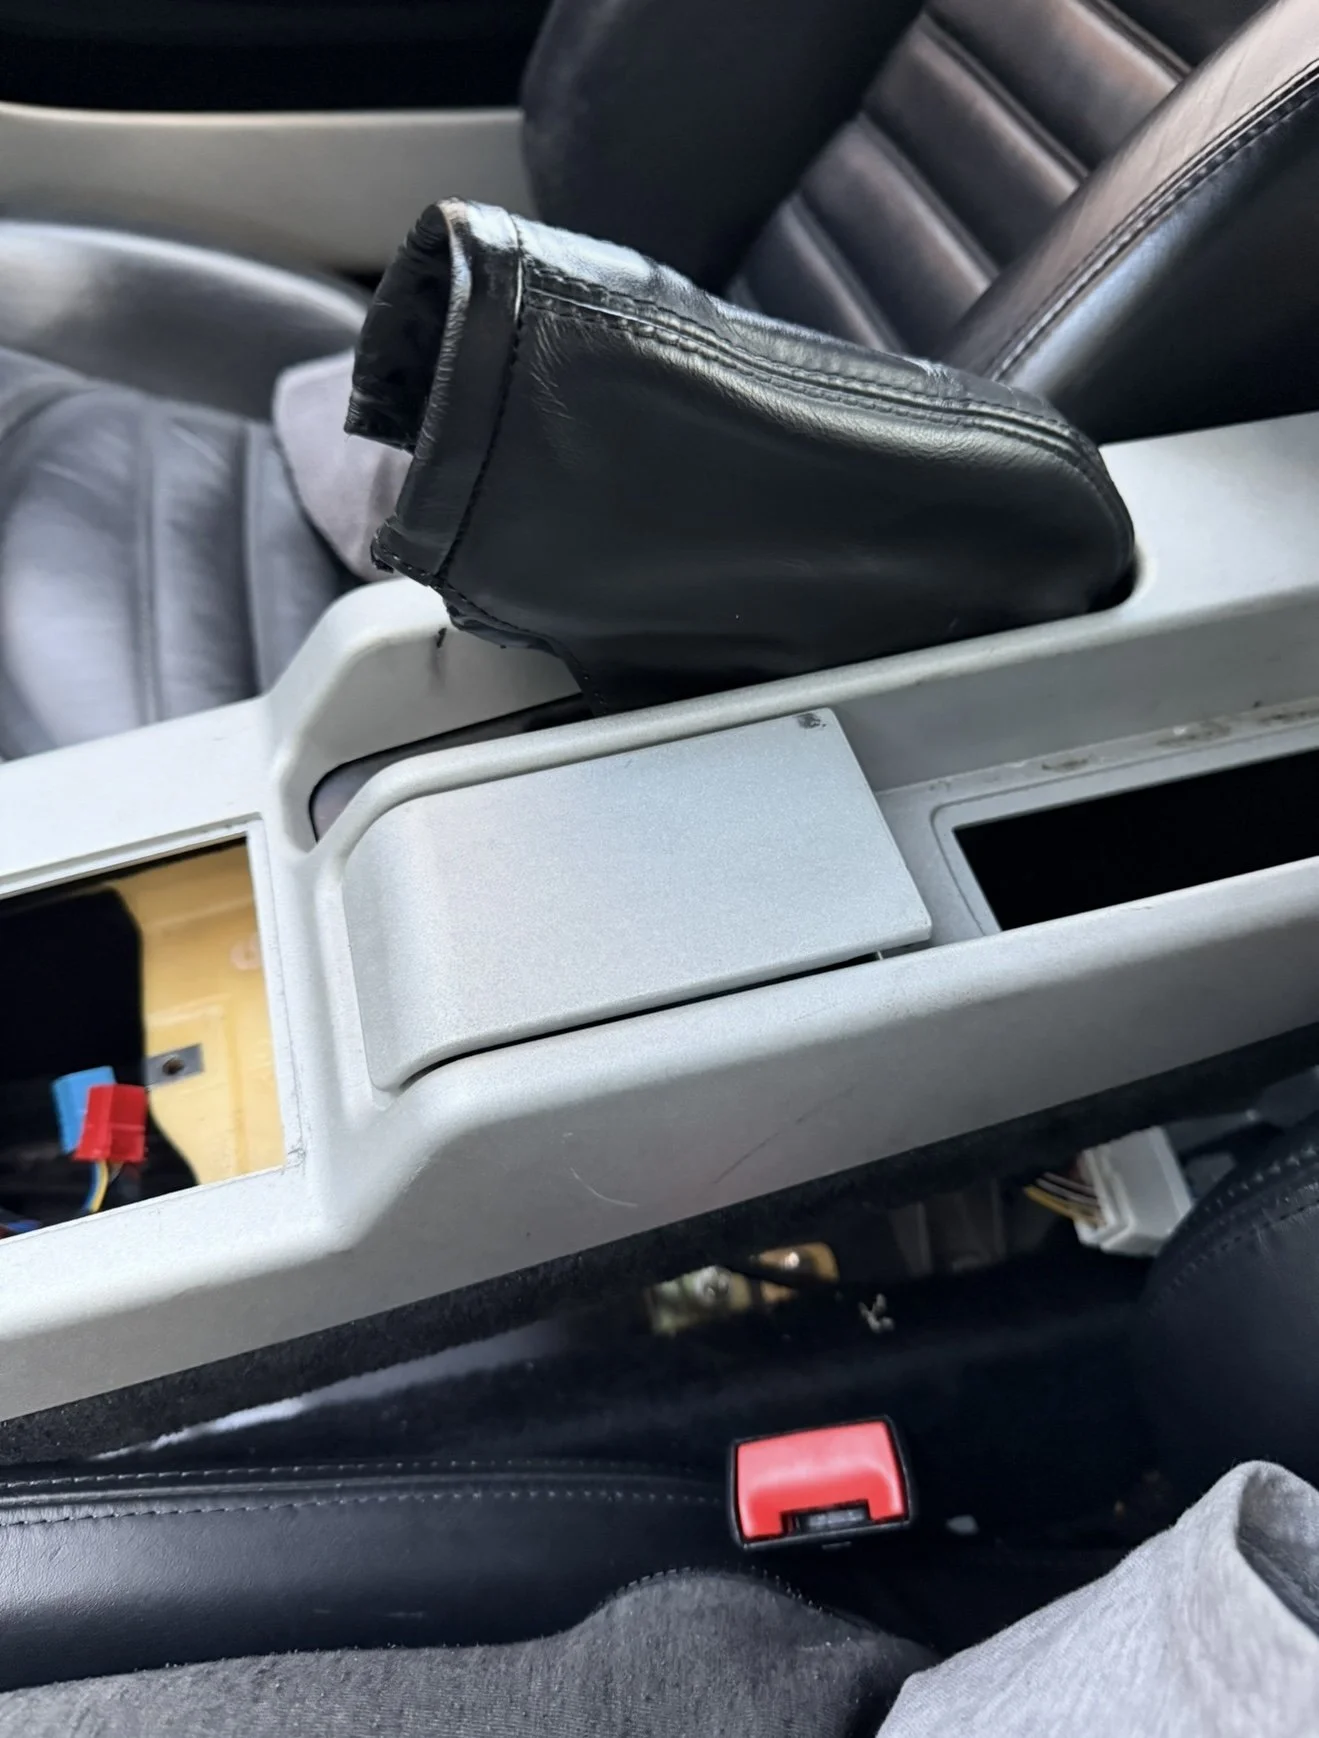
The centre console should now be free to move. Push the black trim down inside the handbrake area in order to manoeuvre the centre console up and over the handbrake.
Step 12
I laid the centre console on its side in the middle of the car. This gives you access to the 4 screws holding the existing panel in the car.
Remove the 4 screws highlighted above. The panel should now push out the top of the centre console.
Step 13
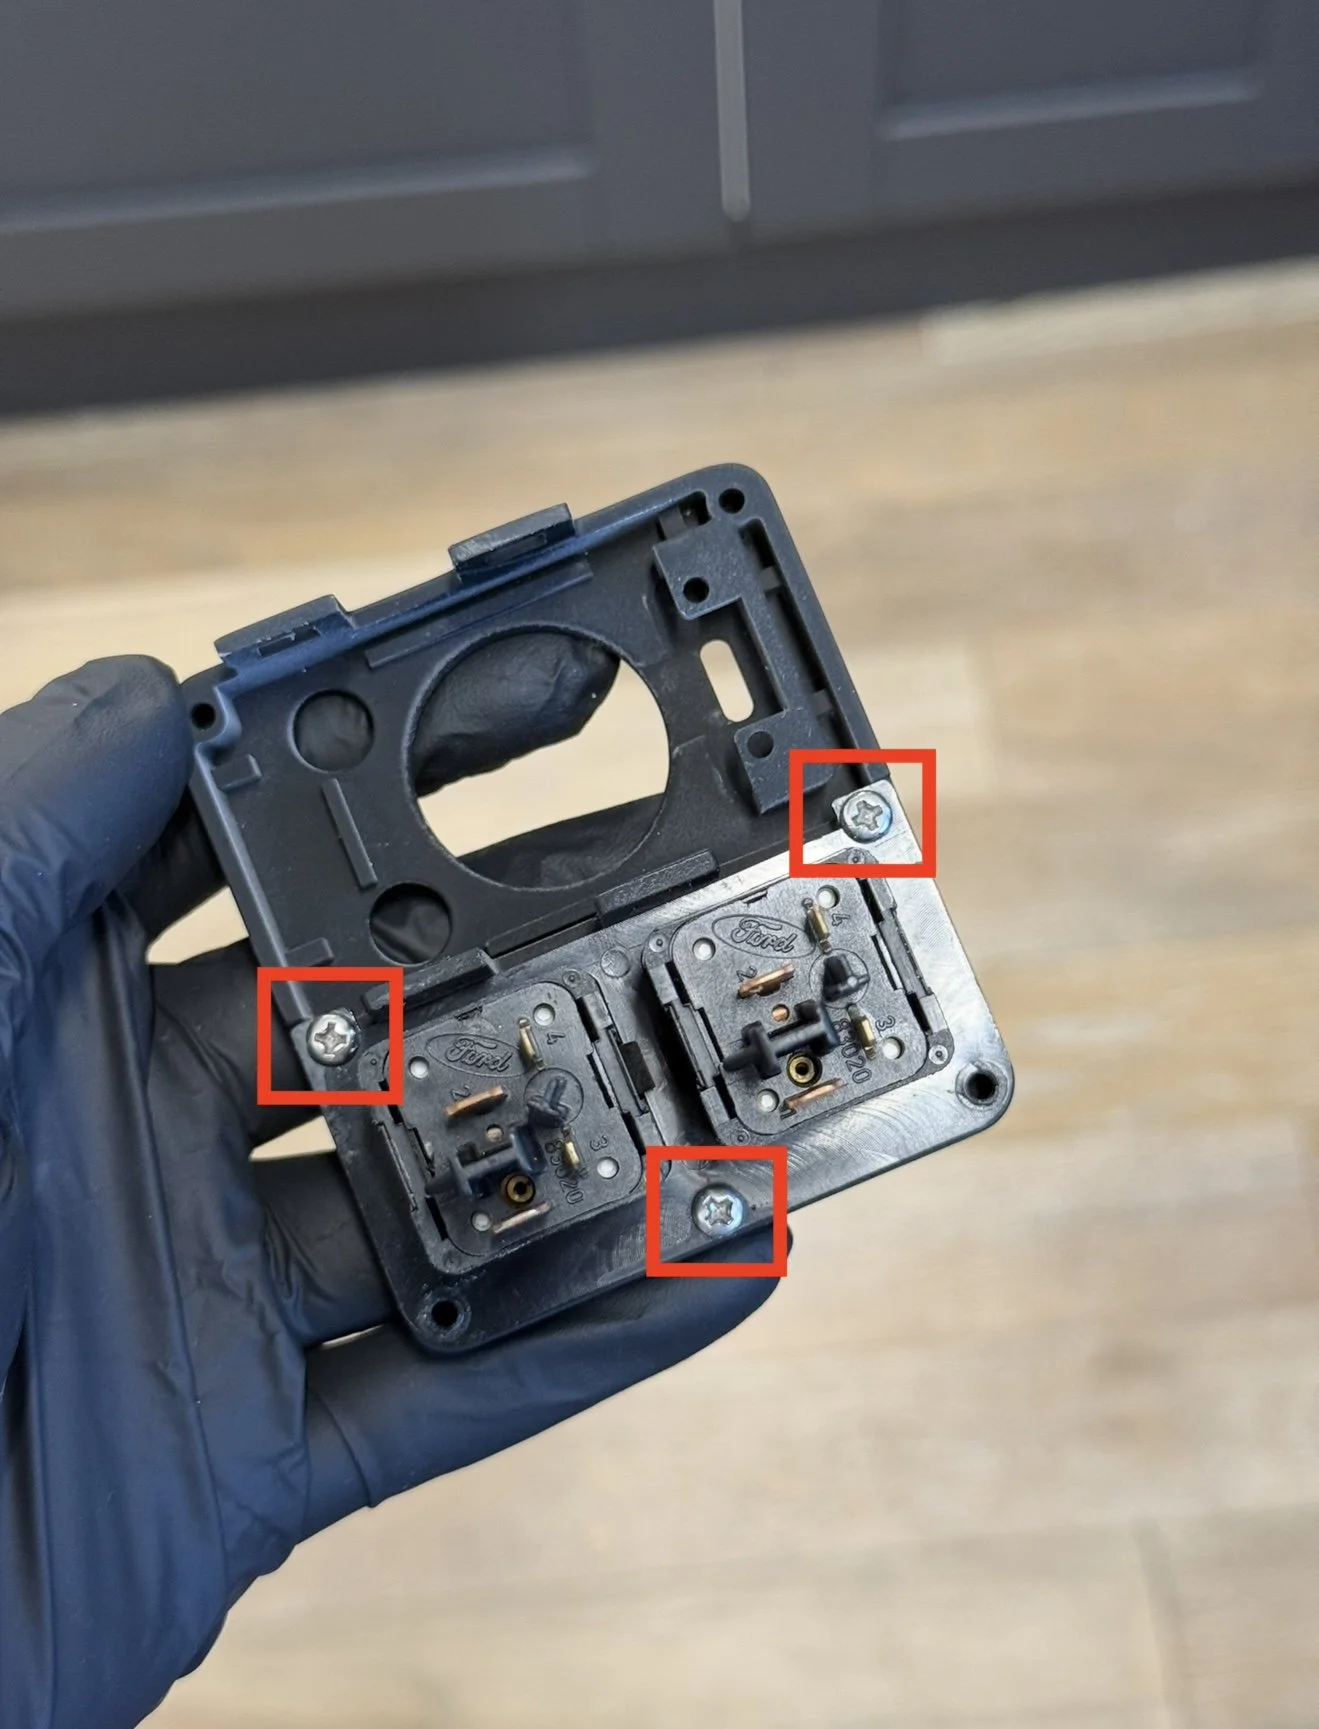
Remove the 3 screws holding in the hazard button and parking light. Use the new screws provided to transfer these buttons onto the new USB panel. Be careful not to over tighten the screws as the threads in the panel are plastic.
Step 14
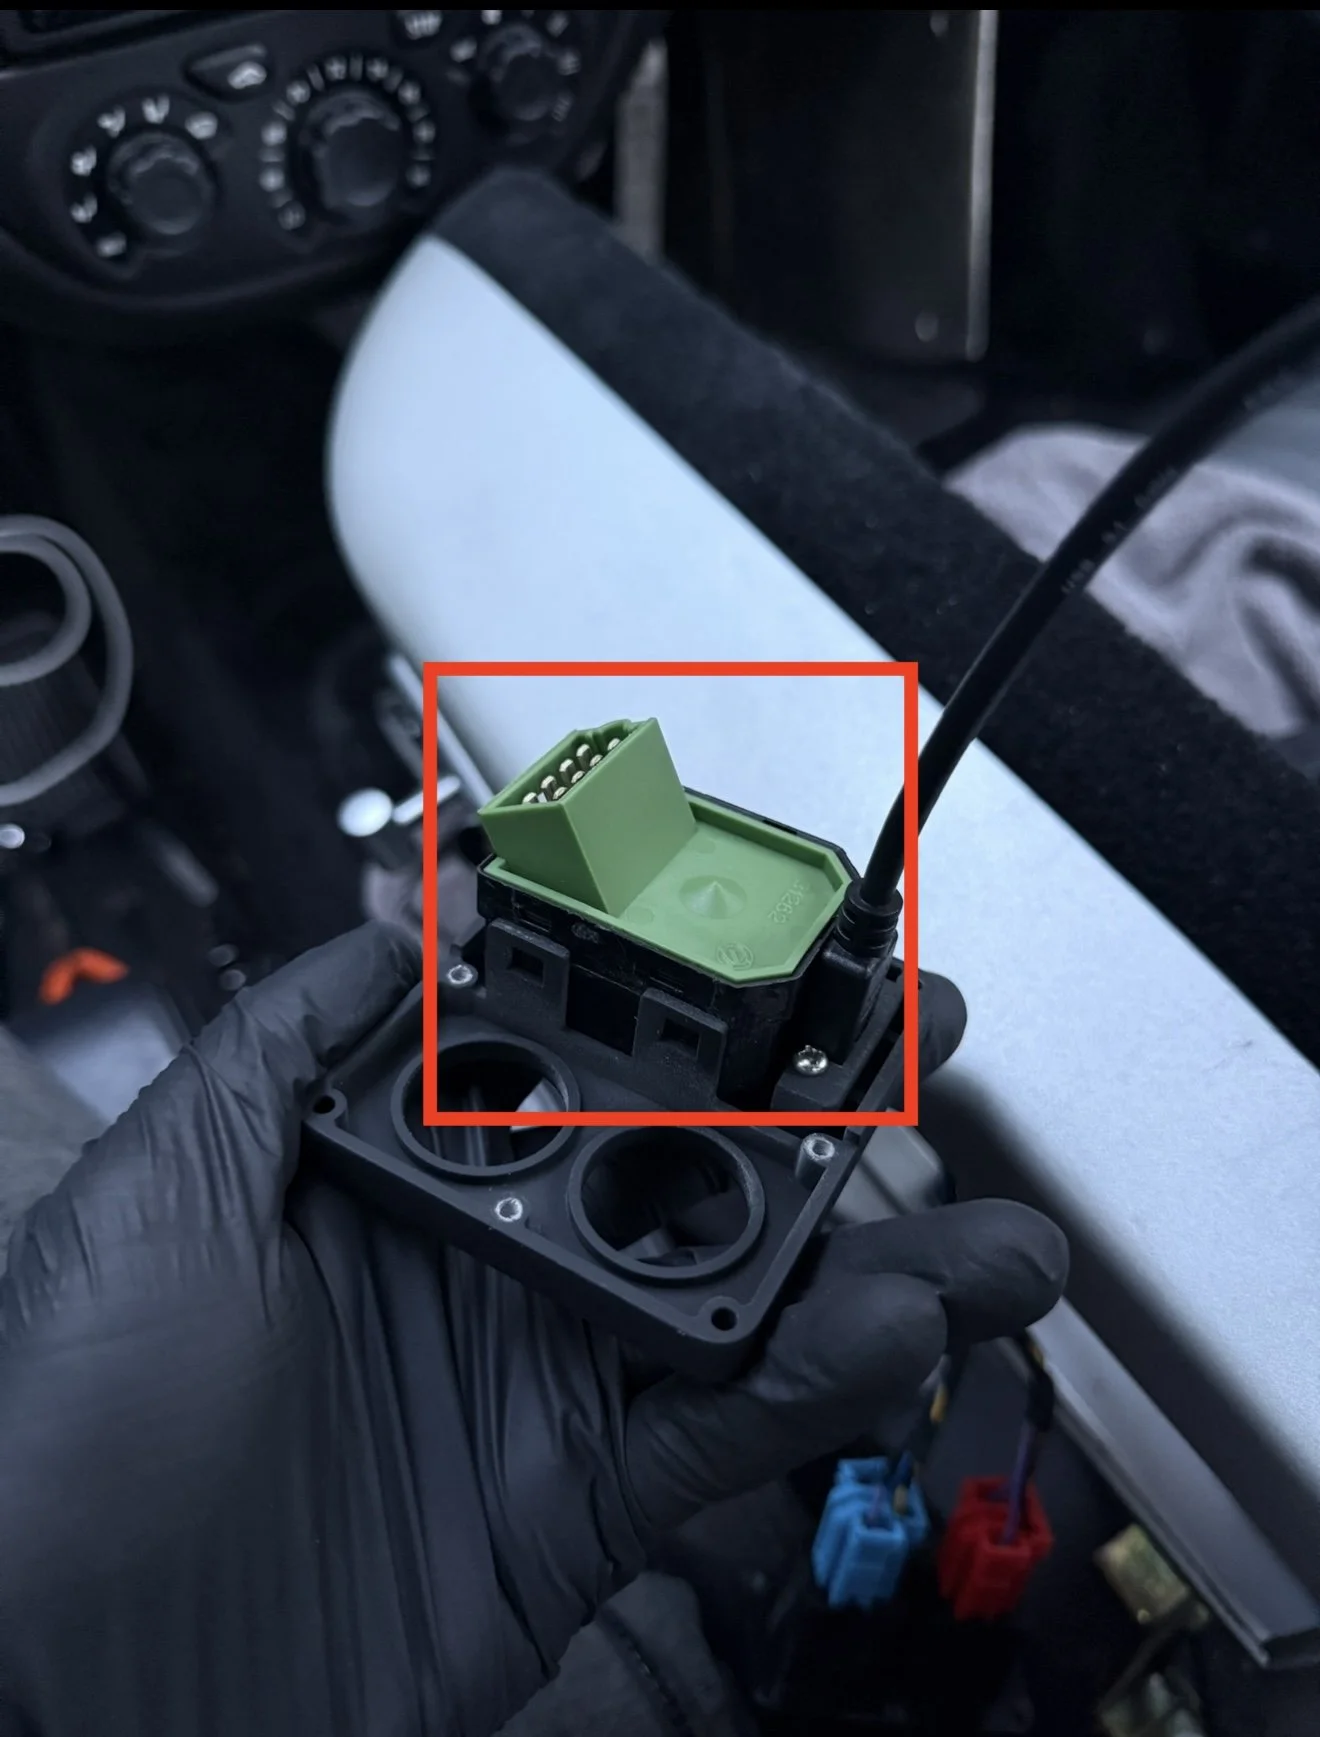
Unplug the wing mirror L + R controls from the original panel with the tabs at the side and clip it into the new USB panel. I suggest also removing the cable from the switch as it helps with reinstallation in the next step.
Step 15
Once all the switches are attached to the new panel. Feed the new panel into the centre console like how the original one was removed.
This is a tight fit due to the new usb cable, there should be enough room to bend the usb cable slightly to fit the new panel if needed.
Step 16
Use the new screws provided to reinstall the new USB Panel. Be careful not to over tighten the screws as the threads on the panel are plastic.
Step 17
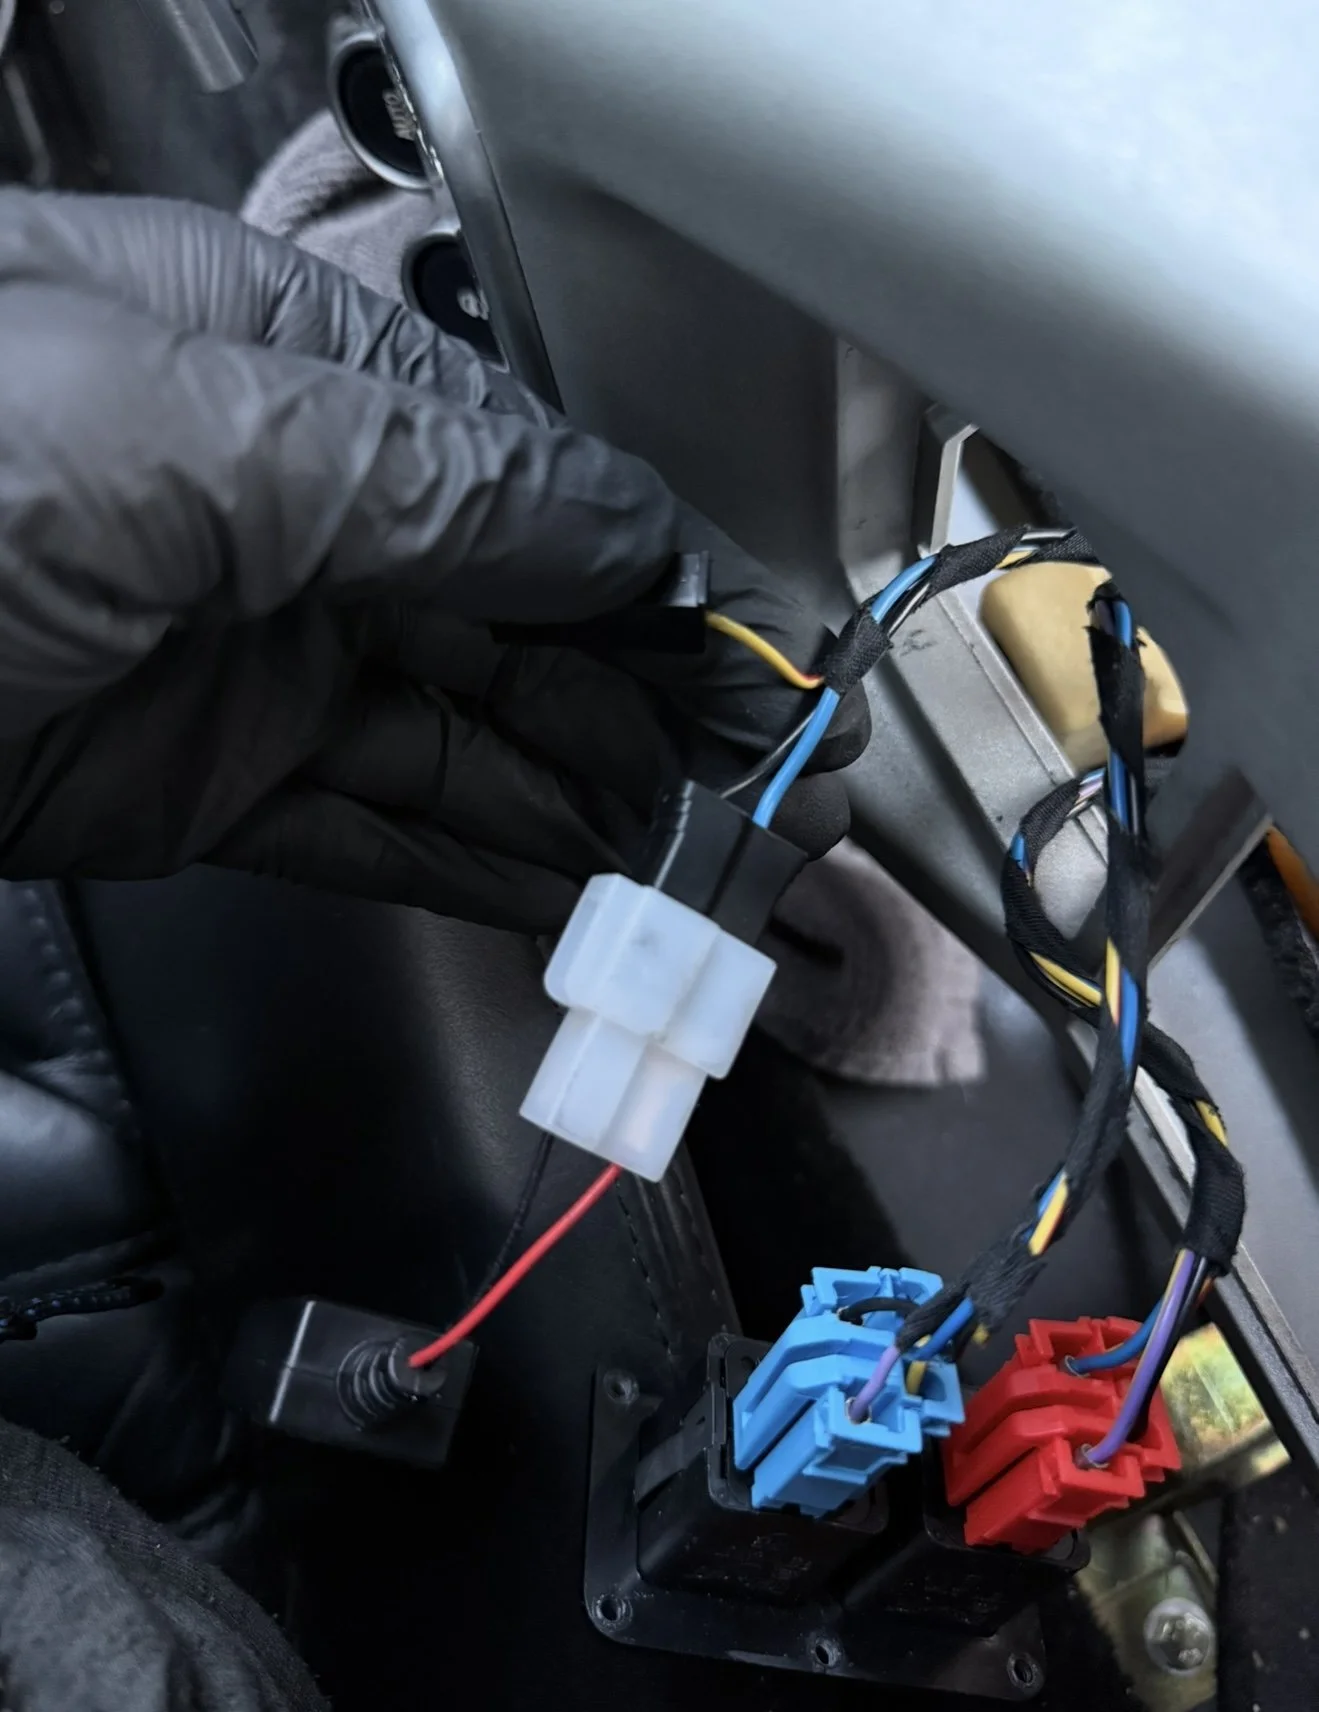
Install the power adapter into the existing power cable for the cigarette lighter. As a precaution please confirm the polarity of the cables on your car before connecting the power adapter.
The blue cable was positive on my car.
Step 18
Install the USB C cable into the power adapter and turn on the power adapter.
Please follow the steps in reverse for reinstalling the centre console.
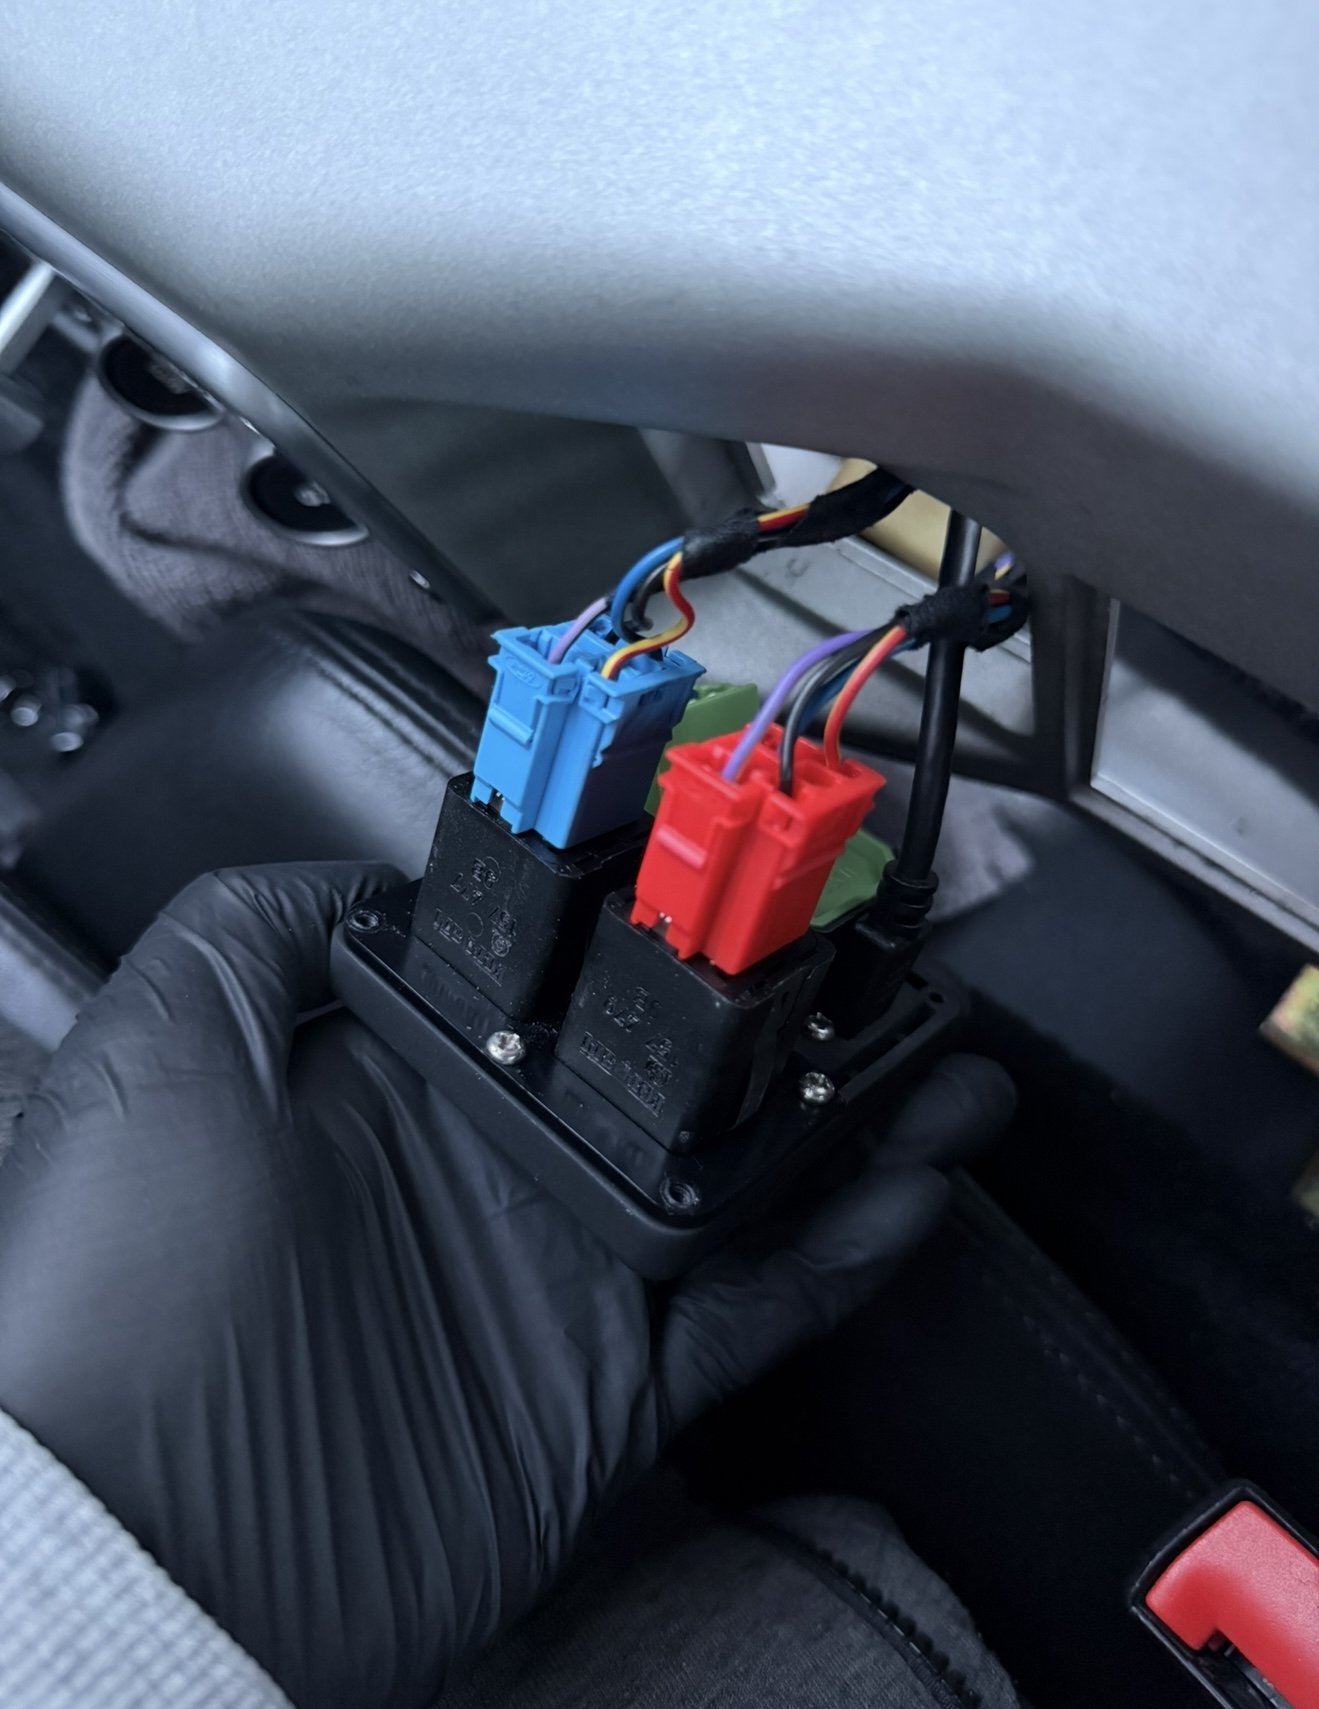
Unfortunately due to the insurance I currently have, I am not able to supply the 12v to USB C power adapters that I have sourced (see photos). These are readily available online if you search for motorcycle usb c power adapter. However, I will include the connector and crimp wire terminals required for the power adapter to plug it into the cigarette lighter power source.
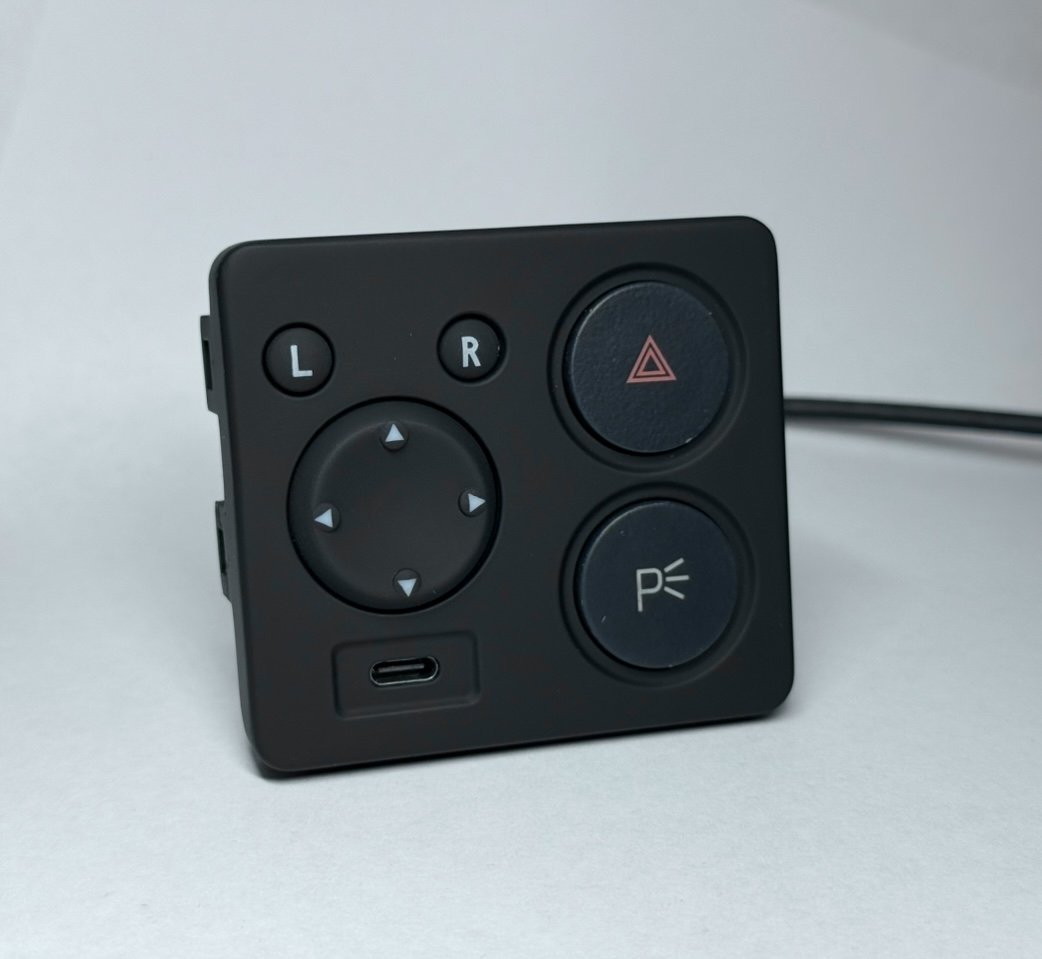
Upgrade your Ferrari 360 interior with this replacement USB panel, designed as a direct swap for the original factory part.
The wiring harness connects to the existing power cable for the cigarette lighter. This panel is best suited for owners who have replaced their center console cigarette lighter compartment with a cup holder.
Compatibility:
Designed to fit the 2000 model year and newer Ferrari 360, however please verify your vehicle's compatibility before purchase. Some early models came with a different wing mirror switch panel layout which isn't compatible.
Package Includes:
1x Ferrari 360 USB C Panel
1x USB C Cable
1x Replacement hardware kit including connector for power source.
Installation:
Installation Guide
Required:
Power adapter to convert the 12v cigarette lighter into USB C.
Please note: The panel is hand finished so there may be minor imperfections on surfaces that are not visible once installed.
Disclaimer:
The installation instructions provided are intended as a general guide only. Performance Car Prints is not responsible for any damage or injury caused to you, your vehicle, or any property during installation or use of our products. Proceed at your own discretion and ensure all modifications comply with local laws and safety standards. If in doubt, seek professional assistance. Use of this guide is entirely at your own risk.